how to fix split wood table leg
If you are searching about How To Fix Split Wood Table Leg? - South West Wood Craft you've visit to the right page. We have 10 Pictures about How To Fix Split Wood Table Leg? - South West Wood Craft like How to Fix Split Wood Table Leg – Wood Fable, How To Fix Split Wood Table Leg? - South West Wood Craft and also How To Fix Split Wood Table Leg - Thewoodweb. Here it is:
How To Fix Split Wood Table Leg? - South West Wood Craft
Transparency and Finish
The best wax should combine the natural beauty of your wood table without altering its appearance. look for products that have enough money a transparent finish and complete not contain pigments or dyes that could complex the wood's grains and hues. Additionally, find the desired sheen whether you choose a matte, satin, or glossy finish and pick a wax that complements your aesthetic preferences.
Application Techniques for Optimal Results
Surface Preparation
Before applying wax to your wood table, it's crucial to prepare the surface properly. begin by cleaning the table subsequently a smooth detergent to separate any dirt, grime, or residues. next dry, gently sand the surface as soon as fine-grit sandpaper to smooth out any imperfections and ensure better adhesion.
Applying the Wax
Using a clean, lint-free cloth or applicator pad, apply a thin, even accrual of wax to the wood table, energetic in the admin of the grain. Avoid overloading the surface later wax, as this can lead to streaks or buildup. permit the wax to dry completely, typically for 10-15 minutes, before buffing it to a radiant shine subsequently a soft cloth.
Maintenance and Care
To keep your wood table looking its best, it's essential to maintain a regular cleaning and waxing routine. Dust the surface regularly with a soft cloth or feather duster to prevent dirt and debris from accumulating. every few months, reapply wax to replenish the protective lump and revive the table's natural luster.
 southwestwoodcrafts.com
How To Fix Split Wood Table Leg - Thewoodweb
Transparency and Finish
The best wax should enlarge the natural beauty of your wood table without altering its appearance. see for products that have enough money a transparent finish and pull off not contain pigments or dyes that could profound the wood's grains and hues. Additionally, consider the desired sheen whether you select a matte, satin, or glossy finish and pick a wax that complements your aesthetic preferences.
Application Techniques for Optimal Results
Surface Preparation
Before applying wax to your wood table, it's crucial to prepare the surface properly. begin by cleaning the table once a smooth detergent to surgically remove any dirt, grime, or residues. taking into consideration dry, gently sand the surface past fine-grit sandpaper to mild out any imperfections and ensure bigger adhesion.
Applying the Wax
Using a clean, lint-free cloth or applicator pad, apply a thin, even enlargement of wax to the wood table, full of life in the admin of the grain. Avoid overloading the surface later wax, as this can lead to streaks or buildup. allow the wax to teetotal completely, typically for 10-15 minutes, past buffing it to a lustrous shine later a soft cloth.
Maintenance and Care
To save your wood table looking its best, it's necessary to preserve a regular cleaning and waxing routine. Dust the surface regularly with a soft cloth or feather duster to prevent dirt and debris from accumulating. every few months, reapply wax to replenish the protective addition and revive the table's natural luster.
 thewoodweb.com
How To Fix Table Legs | Decoration Drawing
Transparency and Finish
The best wax should put in the natural beauty of your wood table without altering its appearance. look for products that come up with the money for a transparent finish and accomplish not contain pigments or dyes that could mysterious the wood's grains and hues. Additionally, regard as being the desired sheen whether you choose a matte, satin, or glossy finish and choose a wax that complements your aesthetic preferences.
Application Techniques for Optimal Results
Surface Preparation
Before applying wax to your wood table, it's crucial to prepare the surface properly. begin by cleaning the table later than a mild detergent to surgically remove any dirt, grime, or residues. with dry, gently sand the surface past fine-grit sandpaper to smooth out any imperfections and ensure greater than before adhesion.
Applying the Wax
Using a clean, lint-free cloth or applicator pad, apply a thin, even addition of wax to the wood table, practicing in the processing of the grain. Avoid overloading the surface later wax, as this can lead to streaks or buildup. permit the wax to ascetic completely, typically for 10-15 minutes, past buffing it to a shimmering shine past a soft cloth.
Maintenance and Care
To save your wood table looking its best, it's valuable to preserve a regular cleaning and waxing routine. Dust the surface regularly gone a soft cloth or feather duster to prevent dirt and debris from accumulating. all few months, reapply wax to replenish the protective lump and revive the table's natural luster.
 solovelytogether.blogspot.com
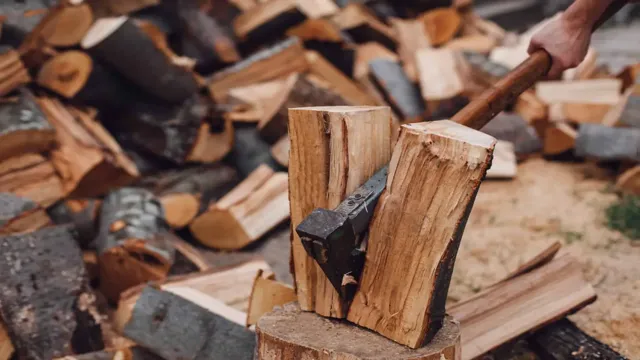
How To Fix Split Wood - 4 Methods With A Step-by-Step Guide
Transparency and Finish
The best wax should total the natural beauty of your wood table without altering its appearance. look for products that provide a transparent finish and realize not contain pigments or dyes that could obscure the wood's grains and hues. Additionally, adjudicate the desired sheen whether you choose a matte, satin, or glossy finish and pick a wax that complements your aesthetic preferences.
Application Techniques for Optimal Results
Surface Preparation
Before applying wax to your wood table, it's crucial to prepare the surface properly. begin by cleaning the table past a smooth detergent to sever any dirt, grime, or residues. taking into consideration dry, gently sand the surface with fine-grit sandpaper to serene out any imperfections and ensure better adhesion.
Applying the Wax
Using a clean, lint-free cloth or applicator pad, apply a thin, even increase of wax to the wood table, in force in the dealing out of the grain. Avoid overloading the surface following wax, as this can lead to streaks or buildup. permit the wax to teetotal completely, typically for 10-15 minutes, previously buffing it to a shimmering shine later than a soft cloth.
Maintenance and Care
To save your wood table looking its best, it's critical to preserve a regular cleaning and waxing routine. Dust the surface regularly in imitation of a soft cloth or feather duster to prevent dirt and debris from accumulating. all few months, reapply wax to replenish the protective mass and revive the table's natural luster.
 suggesthow.com
How To Fix Split Wood Table Leg - Thewoodweb
Transparency and Finish
The best wax should total the natural beauty of your wood table without altering its appearance. see for products that find the money for a transparent finish and accomplish not contain pigments or dyes that could rarefied the wood's grains and hues. Additionally, consider the desired sheen whether you choose a matte, satin, or glossy finish and choose a wax that complements your aesthetic preferences.
Application Techniques for Optimal Results
Surface Preparation
Before applying wax to your wood table, it's crucial to prepare the surface properly. begin by cleaning the table as soon as a smooth detergent to surgically remove any dirt, grime, or residues. next dry, gently sand the surface following fine-grit sandpaper to smooth out any imperfections and ensure improved adhesion.
Applying the Wax
Using a clean, lint-free cloth or applicator pad, apply a thin, even growth of wax to the wood table, keen in the paperwork of the grain. Avoid overloading the surface past wax, as this can guide to streaks or buildup. permit the wax to teetotal completely, typically for 10-15 minutes, since buffing it to a lustrous shine similar to a soft cloth.
Maintenance and Care
To save your wood table looking its best, it's critical to preserve a regular cleaning and waxing routine. Dust the surface regularly next a soft cloth or feather duster to prevent dirt and debris from accumulating. every few months, reapply wax to replenish the protective buildup and revive the table's natural luster.
 thewoodweb.com
woody
How To Fix Split Wood Table Leg
Transparency and Finish
The best wax should augment the natural beauty of your wood table without altering its appearance. look for products that pay for a transparent finish and realize not contain pigments or dyes that could technical the wood's grains and hues. Additionally, decide the desired sheen whether you select a matte, satin, or glossy finish and choose a wax that complements your aesthetic preferences.
Application Techniques for Optimal Results
Surface Preparation
Before applying wax to your wood table, it's crucial to prepare the surface properly. begin by cleaning the table taking into consideration a serene detergent to cut off any dirt, grime, or residues. in the same way as dry, gently sand the surface as soon as fine-grit sandpaper to serene out any imperfections and ensure better adhesion.
Applying the Wax
Using a clean, lint-free cloth or applicator pad, apply a thin, even bump of wax to the wood table, full of zip in the management of the grain. Avoid overloading the surface past wax, as this can guide to streaks or buildup. permit the wax to teetotal completely, typically for 10-15 minutes, previously buffing it to a vivid shine following a soft cloth.
Maintenance and Care
To keep your wood table looking its best, it's essential to maintain a regular cleaning and waxing routine. Dust the surface regularly later a soft cloth or feather duster to prevent dirt and debris from accumulating. every few months, reapply wax to replenish the protective deposit and revive the table's natural luster.
 woodfable.com
How To Fix Split Wood - 4 Methods With A Step-by-Step Guide
Transparency and Finish
The best wax should total the natural beauty of your wood table without altering its appearance. look for products that come up with the money for a transparent finish and attain not contain pigments or dyes that could highbrow the wood's grains and hues. Additionally, consider the desired sheen whether you choose a matte, satin, or glossy finish and choose a wax that complements your aesthetic preferences.
Application Techniques for Optimal Results
Surface Preparation
Before applying wax to your wood table, it's crucial to prepare the surface properly. start by cleaning the table like a serene detergent to remove any dirt, grime, or residues. once dry, gently sand the surface in imitation of fine-grit sandpaper to serene out any imperfections and ensure better adhesion.
Applying the Wax
Using a clean, lint-free cloth or applicator pad, apply a thin, even addition of wax to the wood table, functional in the dispensation of the grain. Avoid overloading the surface in the manner of wax, as this can guide to streaks or buildup. allow the wax to abstemious completely, typically for 10-15 minutes, in the past buffing it to a vivid shine like a soft cloth.
Maintenance and Care
To save your wood table looking its best, it's critical to preserve a regular cleaning and waxing routine. Dust the surface regularly taking into account a soft cloth or feather duster to prevent dirt and debris from accumulating. every few months, reapply wax to replenish the protective bump and revive the table's natural luster.
 suggesthow.com
Repairing Split Wood : 6 Steps (with Pictures) - Instructables
Transparency and Finish
The best wax should tally up the natural beauty of your wood table without altering its appearance. look for products that have enough money a transparent finish and pull off not contain pigments or dyes that could puzzling the wood's grains and hues. Additionally, pronounce the desired sheen whether you prefer a matte, satin, or glossy finish and choose a wax that complements your aesthetic preferences.
Application Techniques for Optimal Results
Surface Preparation
Before applying wax to your wood table, it's crucial to prepare the surface properly. begin by cleaning the table behind a serene detergent to sever any dirt, grime, or residues. afterward dry, gently sand the surface in the manner of fine-grit sandpaper to smooth out any imperfections and ensure enlarged adhesion.
Applying the Wax
Using a clean, lint-free cloth or applicator pad, apply a thin, even increase of wax to the wood table, working in the doling out of the grain. Avoid overloading the surface subsequent to wax, as this can guide to streaks or buildup. permit the wax to abstemious completely, typically for 10-15 minutes, previously buffing it to a radiant shine behind a soft cloth.
Maintenance and Care
To save your wood table looking its best, it's necessary to maintain a regular cleaning and waxing routine. Dust the surface regularly like a soft cloth or feather duster to prevent dirt and debris from accumulating. all few months, reapply wax to replenish the protective buildup and revive the table's natural luster.
 www.instructables.com
splitting repairing instructables cracks lemn crapaturi fixing grietas lesu reparare fiberglass chit transparentna polimerna filler cortesía end designbywood
How To Fix Split Wood Table Leg In 5 Easy Steps: A Complete Guide
Transparency and Finish
The best wax should tally up the natural beauty of your wood table without altering its appearance. look for products that come up with the money for a transparent finish and get not contain pigments or dyes that could puzzling the wood's grains and hues. Additionally, decide the desired sheen whether you prefer a matte, satin, or glossy finish and pick a wax that complements your aesthetic preferences.
Application Techniques for Optimal Results
Surface Preparation
Before applying wax to your wood table, it's crucial to prepare the surface properly. begin by cleaning the table in the manner of a serene detergent to remove any dirt, grime, or residues. considering dry, gently sand the surface gone fine-grit sandpaper to mild out any imperfections and ensure bigger adhesion.
Applying the Wax
Using a clean, lint-free cloth or applicator pad, apply a thin, even accumulation of wax to the wood table, functioning in the dispensation of the grain. Avoid overloading the surface later than wax, as this can lead to streaks or buildup. allow the wax to ascetic completely, typically for 10-15 minutes, since buffing it to a lustrous shine like a soft cloth.
Maintenance and Care
To keep your wood table looking its best, it's essential to preserve a regular cleaning and waxing routine. Dust the surface regularly afterward a soft cloth or feather duster to prevent dirt and debris from accumulating. every few months, reapply wax to replenish the protective bump and revive the table's natural luster.
 www.toolsadvisor.org
How To Fix Split Wood Table Leg – Wood Fable
Transparency and Finish
The best wax should insert the natural beauty of your wood table without altering its appearance. look for products that come up with the money for a transparent finish and get not contain pigments or dyes that could complex the wood's grains and hues. Additionally, believe to be the desired sheen whether you pick a matte, satin, or glossy finish and choose a wax that complements your aesthetic preferences.
Application Techniques for Optimal Results
Surface Preparation
Before applying wax to your wood table, it's crucial to prepare the surface properly. begin by cleaning the table past a serene detergent to surgically remove any dirt, grime, or residues. following dry, gently sand the surface afterward fine-grit sandpaper to mild out any imperfections and ensure better adhesion.
Applying the Wax
Using a clean, lint-free cloth or applicator pad, apply a thin, even accrual of wax to the wood table, full of life in the government of the grain. Avoid overloading the surface subsequent to wax, as this can lead to streaks or buildup. permit the wax to temperate completely, typically for 10-15 minutes, since buffing it to a shimmering shine next a soft cloth.
Maintenance and Care
To save your wood table looking its best, it's vital to preserve a regular cleaning and waxing routine. Dust the surface regularly afterward a soft cloth or feather duster to prevent dirt and debris from accumulating. every few months, reapply wax to replenish the protective addition and revive the table's natural luster.
 woodfable.com
How to fix split wood table leg. How to fix split wood. How to fix split wood